

Enable File Upload
Description of the Example
(This example builds on the example "Making Files Available for Download.")
In this example, the citizen portal should provide the option to submit or upload documents or files.
To this end, an "Upload Document" button will be implemented.
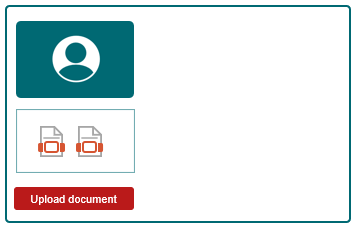
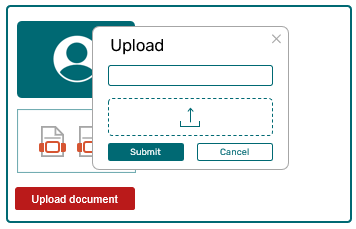
After the user clicks the "Upload Document" button, a dialog box appears. In this dialog box, the user can search for documents on their computer and then upload them.
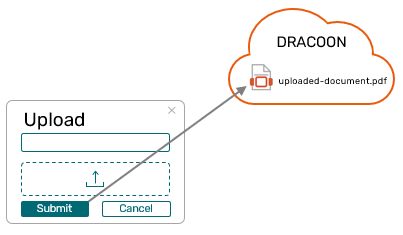
Once you click the "Upload" button, the documents will be uploaded directly to DRACOON.
Requirements
DRACOON
-
The data room has been created.
-
"Upload Folder" has been created.
-
The ID of the "Upload Folder" is known.
Intrexx
-
Intrexx DRACOON Connector was set up ("DracoonConnector").
-
The "IntrexxDracoonApp" application has been created.
-
The external data group "DracoonDocuments" has been added.
Procedure - Overview
File Upload Input Page (Page Wizard)
Add the "File Selection" element.
Add an "Input Field" element ("name" - required field).
Set the "parentId" parameter on the page.
Set Up the "Save" Button
Set a fallback value for parentId.
Add a "Upload Document" button to the "Overview" page
Drag and drop the "Button" element onto the "Overview" page.
Procedure - Step-by-Step
Add a form page for file uploads
Create an input page under the external data group "DracoonDocuments."
(In our example, we're using the Page Wizard.)
-
Launch the Page Wizard.

-
Select the "Input Page" section.
-
Click "Next."
-
Enter a title for the input page ("Upload").
-
Click "Next."
-
Add the "file" and "name" data fields.
(The "name" data field is required in DRACOON.)

-
Click "OK."
The input page appears.
Set the "parentId" parameter on the page
The "parentId" parameter refers to the ID of your upload folder. At the same time, "parentId" is a data field that is included by default in the "DracoonDataSpace" connector data group used in this example. For more information, see the "DracoonDataSpace" data group section.
-
Open the Properties dialog box for the input page.
-
Go to the "Parameters" tab.
-
Click the "
 " icon.
 -
Select "Parameters."

-
Enter "parentId" in the "Name" field. (Note the spelling.)

-
Enter the ID of your upload folder as the fallback value.
You can find the ID in the URL of your DRACOON Web App.

When you click on a data room or folder with the mouse, the ID appears at the end of the URL. The ID always follows "/node/".

-
Click "OK."
Set Up the "Save" Button
-
Click the "Save" button.
-
Go to the "Actions" tab.
-
Click the "Parameters" menu item.
-
Select the "parentId" parameter.
-
Click the arrow next to the plus icon
 .
. -
Select "Fallback Value."

-
In the right-hand pane, select the "Parameters" option (
 ).
). -
In the "Parameter" drop-down menu, select the value "parentId" (
 ).
).
-
Click "OK."
The application looks like this:
(The "Delete" button has been removed.)

Insert the "Upload Document" button
-
Go to the "Overview" page.
-
Drag and drop the "Button" element onto the "Overview" page.
-
On the "General" tab, select "Text."
-
In the "Title" field, enter the text "Upload Document."

-
Go to the "Actions" tab.
-
Select the "Upload" page as your destination.

-
Under "Landing Page Options," select the following options:
-
Open in Tooltip
-
Open Modal
-
Show Close Icon

-
-
Click "OK."
Your sample application now looks like this:

Publish an Application
Save or publish the application.
The application appears (roughly) like this in the browser:

After you click the "Upload Document" button, the application will appear in the browser (roughly) like this:
