Include document display in view table
Below is an example of how you can implement the view of documents in the portal. A view table is used for this. A button in the view table is used to specify the display page with the "File selection view" element as the link destination.
Requirements
In the following example, it is assumed that you have carried out the following actions in connection with the application which you use to access the WebDAV documents:
You have added data fields to the data group.
You have created an input page with the "File selection" element below the data group.
You have created a view page with the "File selection view" element below the data group.
Step-by-step guide
-
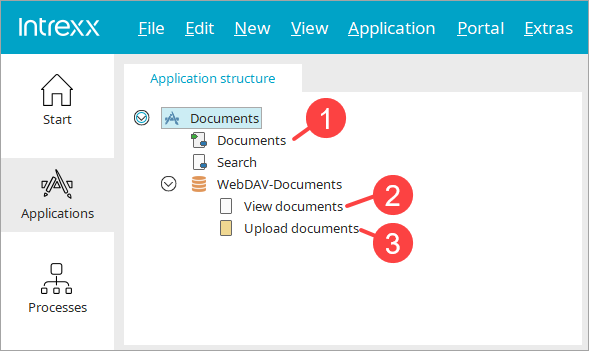
Create a view table on the page on which the links and icons to the (WebDAV) documents should be displayed.
In the example here, this is the "Documents page" (
 ).
). -
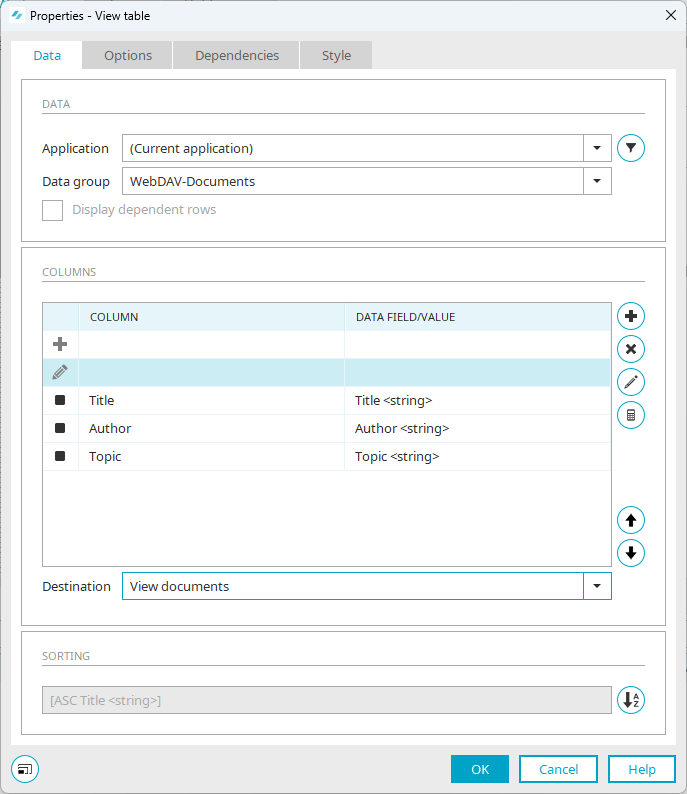
Select the value "(current application)" in the "Application" selection field.
-
In the "Data group" selection field, select the data group that contains the data field for the WebDAV documents.
-
Add the desired data fields.
Do not add the data field for the WebDAV documents.
-
Add two buttons (icons).
The properties of the view table can be displayed as follows, for example:
-
For the button used to call up the display of the WebDAV documents, define the view page on which you have placed the "File selection view" element as the link destination in the "Actions" tab.
In the example here, this is the "Show documents" page (
 ).
). -
For the button used to call up the dialog for uploading WebDAV documents, define the input page on which you have placed the "File selection" element as the link destination in the "Actions" tab.
In the example here, this is the "Upload documents" page (
 ).
).
-
Save or publish the application.