In the following sections, you will find instructions for upgrading from older Intrexx versions to
The instructions are based on Windows with a graphical interface. Upgrades based on Linux with a graphical user interface are performed in a similar manner.
The upgrades can also be performed in the terminal. In Windows, the file consolesetup.bat must be executed. In Linux, the setup.sh file must be executed.
Backup
Before updating or upgrading, you should perform a full backup of the Intrexx and database server. You should use backup software that backs up the entire system and can also restore it if necessary. So that Intrexx can be backed up accordingly, all Intrexx services need to be stopped. Then, the Intrexx installation directory, Intrexx portal directory and external file storage locations and the database can be backed up. The database backup and the Intrexx backup need to have the same state. Changes should not be made to applications or data records during the backup process. As a supporting measure for backups, we recommend automatically scheduling the creation of portal exports. In some cases, a portal export provides a faster and low-effort option for restoring data. However, it is imperative that you know that a portal export is not a full data backup and cannot replace one of these. As a supporting measure for data backups, we recommend scheduling portal exports, since the effort required to restore a portal via a portal export is usually less.
Upgrading an existing installation
You can install Intrexx in a directory where a previous version has already been installed. A key advantage of this approach is that all the existing configurations from the previous Intrexx version are kept.
Using parallel installation
You can install Intrexx in a new directory and then transfer your portal from an earlier Intrexx version to Intrexx. It is common for an upgrade to be installed in a new directory with a planned server change. In this case, the new version is installed on a new, independent server and the old portal is transferred via the portal export/import process. The benefit here is that the system is clean and created without any old burdens. The new system can be migrated completely, and the previous system is still available. The switch to the new server is only made when it is ready to go live. With this option, it is important to remember that all configurations must be remade on the server-side (web server, database, system permissions, etc.).
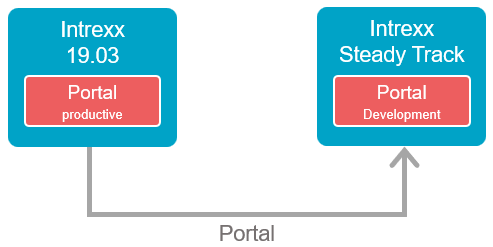
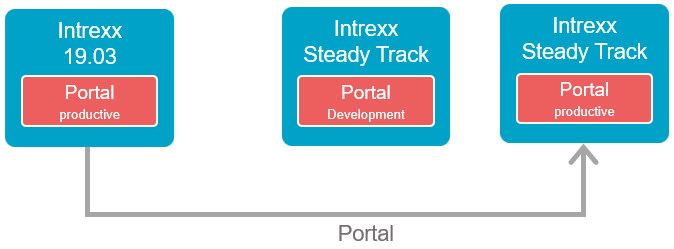
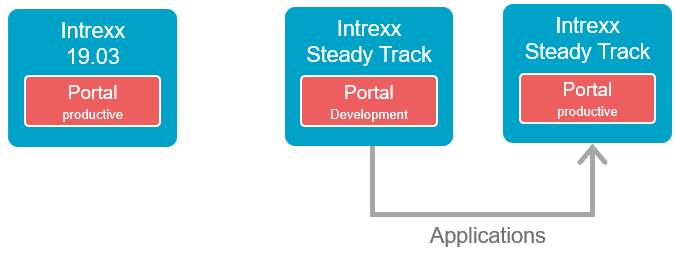
The following provides an overview of one possible approach to a parallel installation. It represents an upgrade from Intrexx 19.03 to Intrexx Steady Track .
Key steps
-
Install Intrexx Intrexx Steady Track . Create a development portal.
-
Export your portal from the earlier Intrexx version and import this into the Intrexx Steady Track development portal.
-
Test your applications in Intrexx Steady Track .
Make any required changes to the applications.
Your current Intrexx 19.03 live portal is still operational and can be accessed by your users. Any data recorded will (continue to) be saved in the previous Intrexx version. -
Create an Intrexx Steady Track live portal.
Export the old portal once more and import it into the Intrexx Steady Track live portal. -
If changes needed to be made to applications, then transfer these from the Intrexx Steady Track development portal to the Intrexx Steady Track live portal.
-
You can now deploy the Intrexx Steady Track live portal as an "active" portal.
-
In general, we recommend creating a test portal alongside the live and development portals.
This can be done by exporting the from Intrexx Steady Track live portal and importing this into the created test portal.
You should not delete your previous Intrexx 19.03 portal just yet.
Background: If users notice unwanted changes concerning configurations or permissions for directories when using the Intrexx Steady Track portal, you can revert to the settings from the previous version of Intrexx as appropriate.


