

To edit your portal, you must first download the Portal Manager and then connect to your portal or the Intrexx Portal Server.
Download Portal Manager
Portal
Go to the Portal at any time to download the Portal Manager that corresponds with your Intrexx version.
-
Enter the URL of your portal into the browser.
By default, this is http://localhost:1337/.
-
Log in to your portal.
-
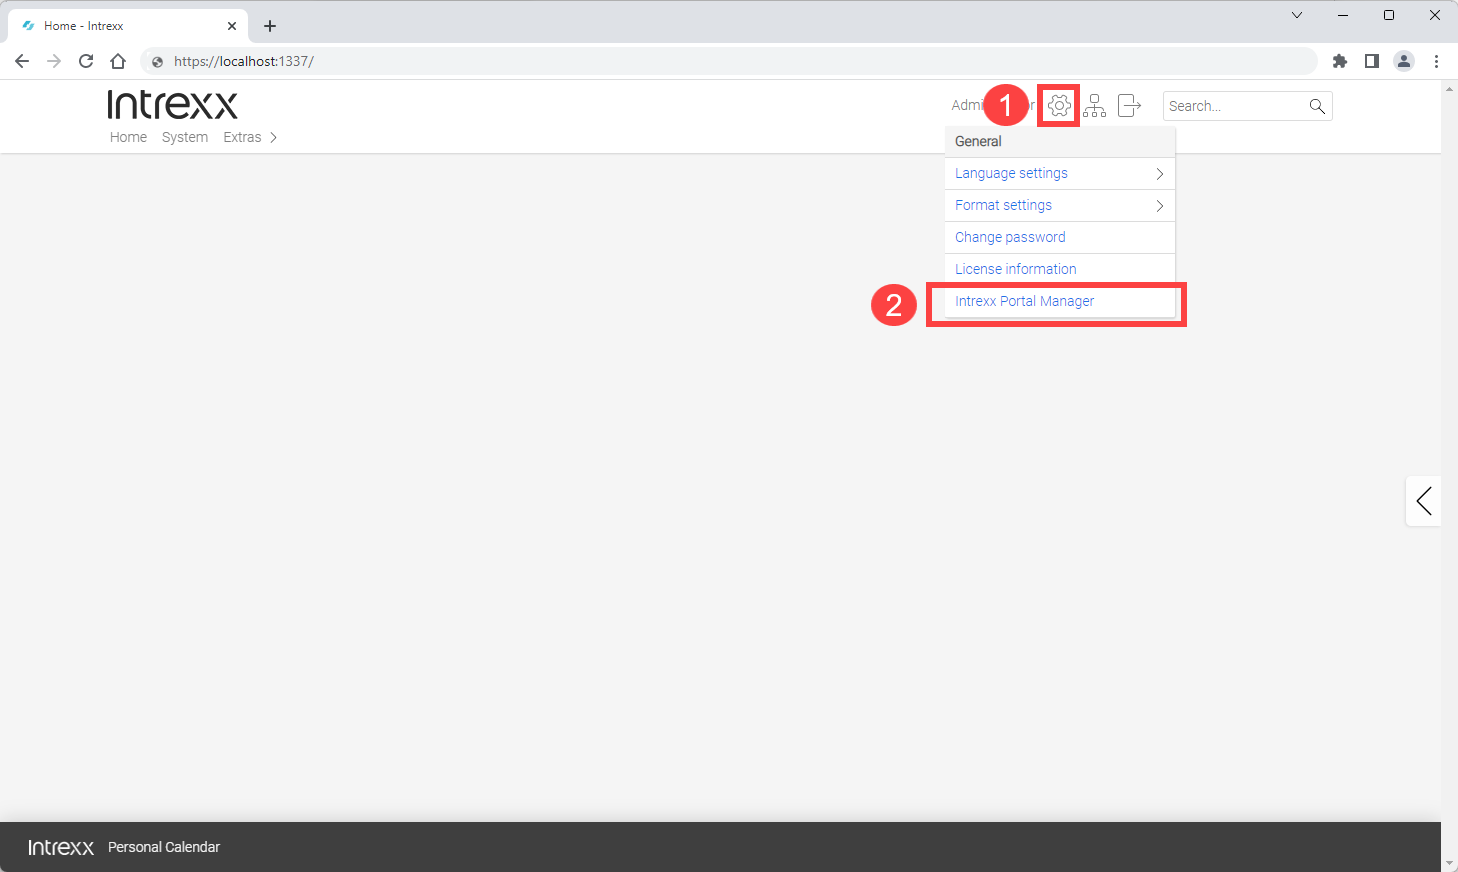
Click on Settings
 (
( ).
). -
Click the "Portal Manager" menu item (
 ).
).
The Portal Manager download will begin.
Connecting to your portal with the Portal Manager
-
Start the Portal Manager.
When you connect to your portal from the network
-
Go to the "Network" tab.
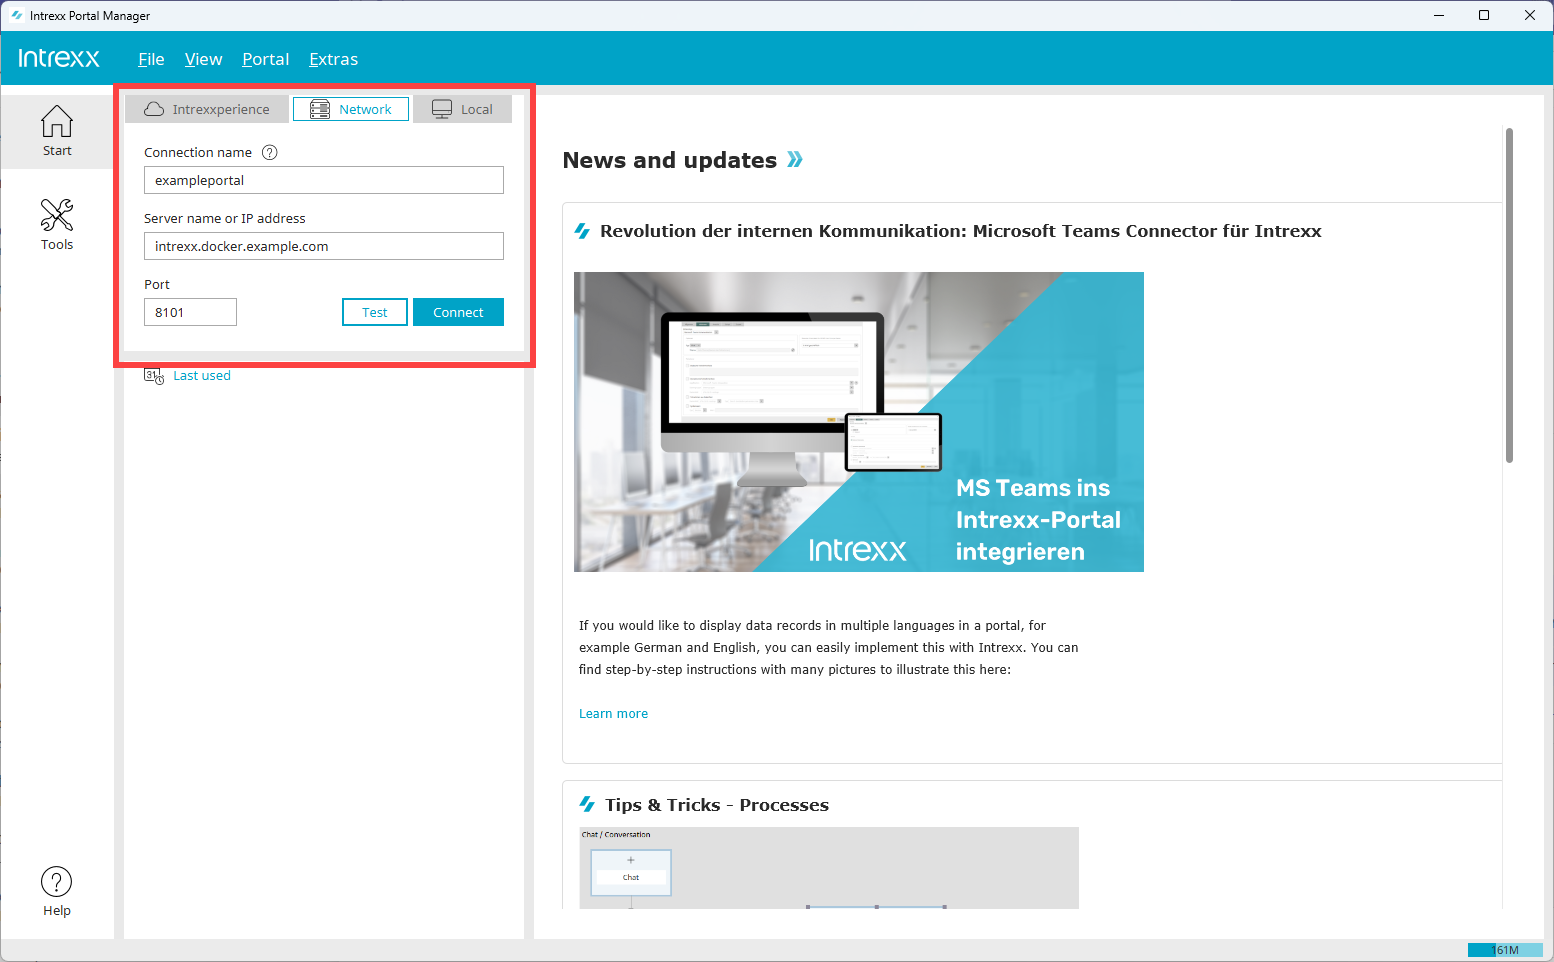
Connection Name
Enter a name here for the connection to your portal. Choose any name you like. The name is then saved and displayed as a hyperlink under "Recently Used" in the login area. To register at a later time, simply click on the hyperlink displayed.
Server name or IP address
Enter the server name or IP address of the server on which the Intrexx Docker container is deployed. The server name must be specified as a hostname without a preceding protocol and without a trailing slash.
Port
Enter the port here for the portal you want to connect to.
When you connect to your portal from the server running Docker
Switch to the "local" tab.
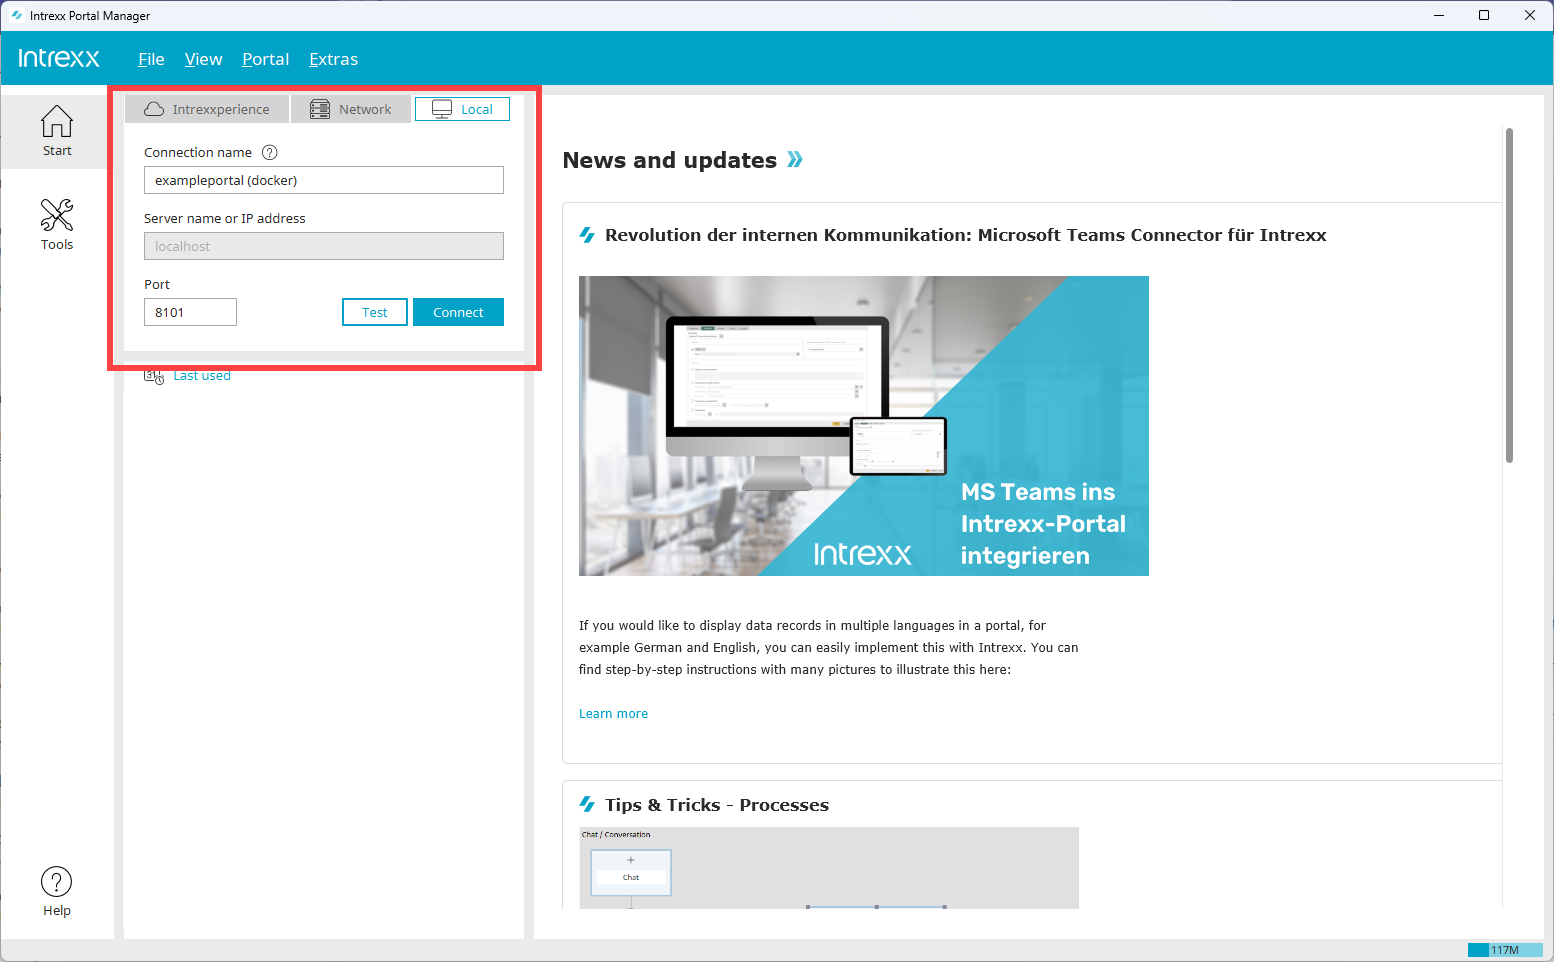
Connection Name
Enter a name here for the connection to your portal. Choose any name you like. The name is then saved and displayed as a hyperlink under "Recently Used" in the login area. To register at a later time, simply click on the hyperlink displayed.
Port
Enter the port here for the portal you want to connect to.
-
Click .
The login dialog box appears.
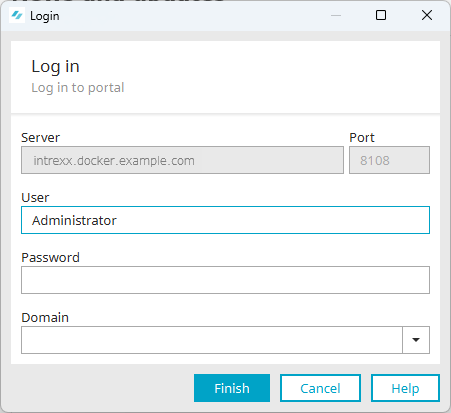
-
Enter your user information here.
-
Click .
The Portal Manager is displayed with all modules and features.
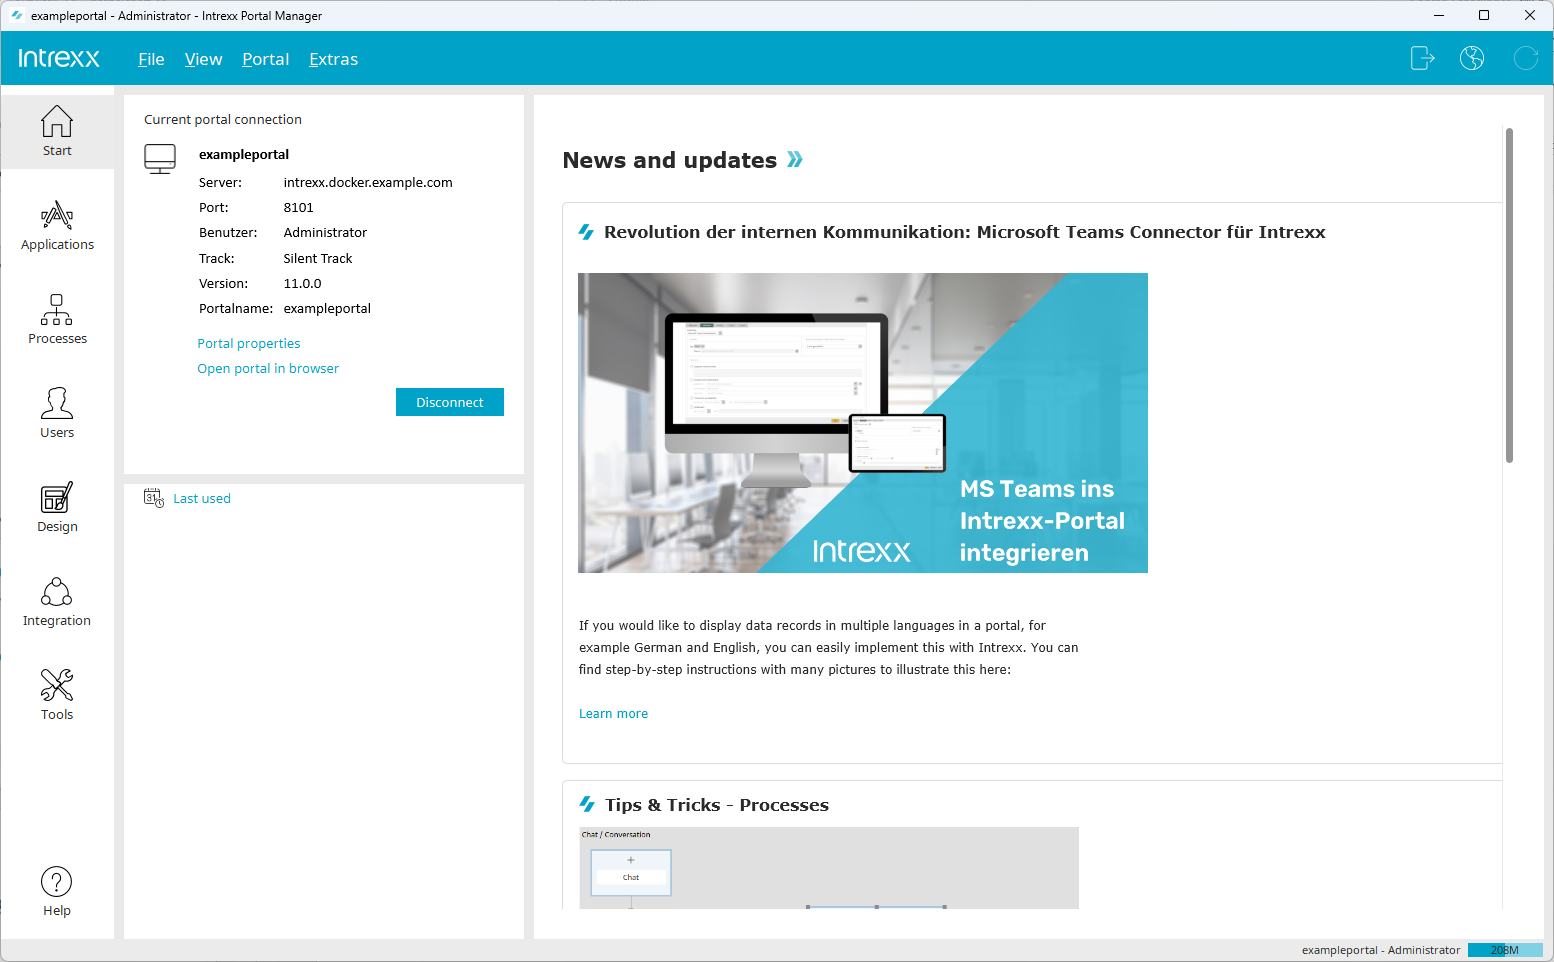
You have logged in to your portal and can now use the features you want.