Step-by-step guide
Proceed as follows to set up a file field in an external data group:
-
Open the external data group.
-
Go to the "Data fields" tab.
-
Select the data field with the data type "file".

-
Click on the
 icon.
icon.The "Data field properties" dialog box is displayed.
-
Switch to the "Expert" tab.
-
Click on .

The following keys and values are displayed:
Key Value connector.cfg.guid mssharepoint_intrexxsharepointconnector connector.file.adapter.class en.uplanet.lucy.server.odata.consumer.sharepoint.SharePointFileAdapter file.deleteFilesOnApplicationRemove true file.exportMode true file.storage (map) sharepoint.checkin false/true sharepoint.list.name [ListName] sharepoint.list.type [ListType] sharepoint.overwrite true/true sharepoint.service.uri https://[TenantName].sharepoint.com sharepoint.site.name [SiteName] In the next steps, you must enter the values for the following keys:
-
sharepoint.checkin
-
sharepoint.list.name
-
sharepoint.list.type
-
sharepoint.overwrite
-
sharepoint.service.uri
-
sharepoint.site.name
-
-
Select the corresponding key.
-
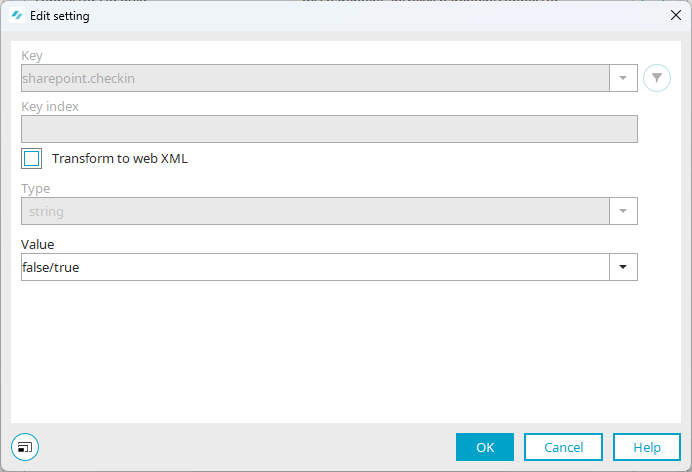
Click on the
icon.The "Edit setting" dialog box opens.
-
Enter the appropriate value in the "Value" selection field.
Key Value/example sharepoint.checkin false/true List
You must enter the value "false" for the "List" list type.
Document library
For the "Document library" list type, you can choose between "true" and "false".
sharepoint.list.name Intrexx Sharepoint List sharepoint.list.type List
Library
sharepoint.overwrite true/true List
You must enter the value "false" for the "List" list type.
Document library
For the "Document library" list type, you can choose between "true" and "false".
sharepoint.service.uri https://examplecompany.sharepoint.com sharepoint.site.name Intrexx Sharepoint Site -
Click on "OK".